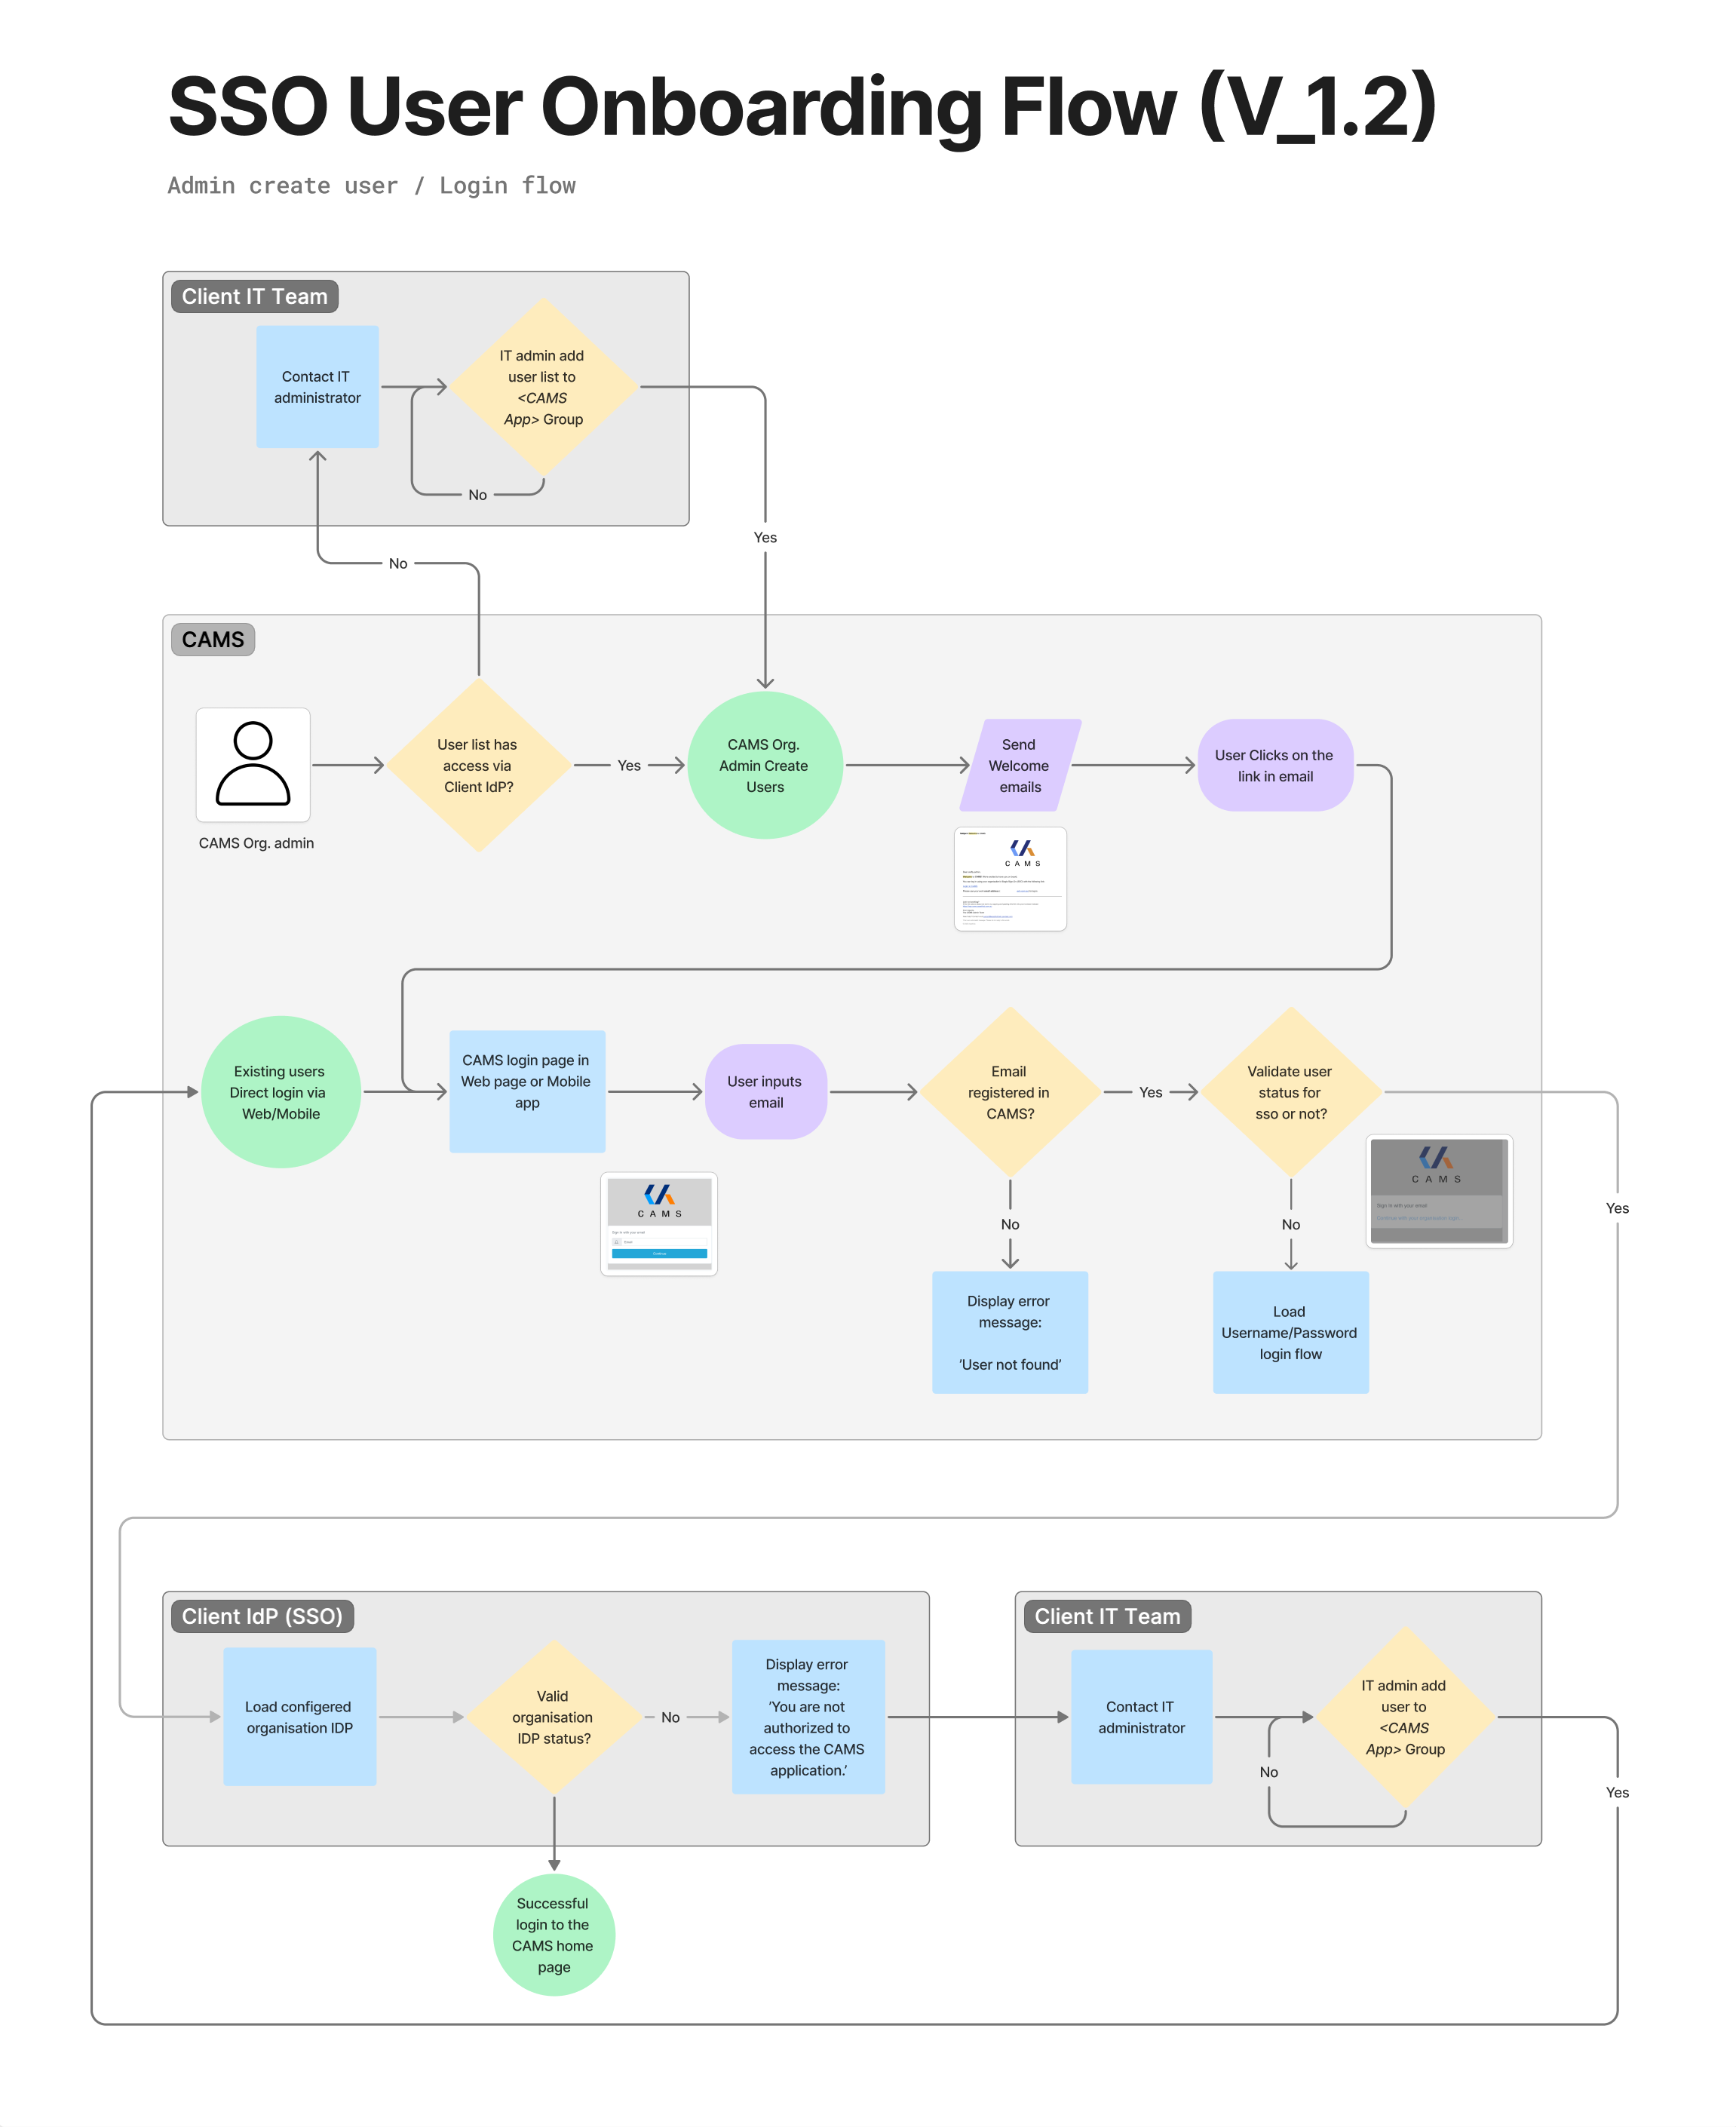
CAMS SSO User Onboarding Workflow
This documentation outlines the process for onboarding users to the CAMS application after successfully configuring the client’s Identity Provider (IdP) for Single Sign-On (SSO).
Prerequisites
- CAMS has been added as a service provider in the client’s IdP. (Use this link)
- The client has shared the necessary SSO metadata
- App Federation Metadata Url
- Claim name of <email address>
- Client IdP is fully configured in CAMS
Step-by-Step SSO User Onboarding Flow
This step-by-step process outlines how users are onboarded to the CAMS platform via SSO. It includes both the administrative steps and the user login workflow.

Step 01: CAMS Org Admin User Creation
In the first phase of onboarding, the Client IT Team plays a critical role in establishing which users should be allowed to access the CAMS application. The Client IT administrator is responsible for adding selected users to the appropriate CAMS App group within their organisation’s Identity Provider (e.g., Azure AD, Okta). This group acts as a gateway for access control — only users within this group will be recognised as eligible for SSO login.
If a user is not part of this group, they will be denied access to CAMS, even if they attempt to log in via the SSO portal. In such cases, the user must be redirected to their IT team for group assignment. This initial step ensures that only pre-approved users are eligible to proceed further in the onboarding journey.
1.1 CAMS Org Admin verifies if the user list has SSO access via the client IdP.
If yes:
- Admin manually creates users in the CAMS system.
- Welcome emails are sent to each new user with a link to complete their setup.
If no, access is blocked and the issue is escalated back to client IT.
. Step 1.1: User Provisioning by Client IT Team
Client IT Admin adds users to the <CAMS App> group in their Identity Provider (IdP).
* If users are not added to the group, they cannot proceed.
* If in doubt, users should contact the client IT administrator.
Step 02: User Login Flow (via SSO)
Once users are added to the correct IdP group, the CAMS Organisation Admin takes over the next step of provisioning. It is not sufficient for a user to exist solely within the client’s IdP — each user must also be explicitly created inside CAMS. This is a security and operational control that ensures all users are visible, manageable, and properly assigned roles within the CAMS platform.
The admin checks whether the user’s email is part of the group with SSO access, and if so, creates the user account within CAMS. Upon creation, a Welcome Email is automatically triggered to the user’s registered email address. Without this creation step by the CAMS admin, users cannot complete their login — even if they exist in the IdP group.
2.1 User receives a welcome email and clicks the link to continue login setup or User opens the CAMS web/mobile login page directly
2.2 User enters their email address.
2.3 System checks:
Is the email registered in CAMS?
* No → Display error: “User not found.”
* Yes → Proceed to next step.
2.4 System checks:
Is the user configured for SSO?
* No → Redirect to Username/Password login flow. (This Flow not applicable for the SSO users)
* Yes → Proceed to SSO login.
Step 03: Identity Provider (IdP) Authentication
In the final phase, the user is redirected from CAMS to the client’s configured Identity Provider(IdP). The IdP loads the login page and authenticates the user’s credentials (e.g., company email and password, or MFA if enabled from client IdP).
Once credentials are submitted, the IdP checks whether the organisation’s IdP configuration is valid and up to date. If the configuration is invalid or the user is not recognised by the IdP, CAMS will display a message: “You are not authorized to access the CAMS application.”
If authentication is successful, the IdP passes a secure token back to CAMS, verifying the user’s identity. The user is then granted access to the CAMS platform and lands on the home dashboard, completing the onboarding process.
3.1 The user is redirected to the client’s configured IdP login screen.
3.2 IdP checks:
Is the organisation’s IdP status valid?
* No → Show error: “You are not authorized to access the CAMS application.” → Proceed with Step 1.1
* Yes → The IdP verifies credentials and redirects user back to CAMS. User is logged in successfully and lands on the CAMS home page.
Related to