Managing SSO Access for CAMS Users
This article is designed for IT administrators and technical users who are responsible for managing SSO (Single Sign-On) access within their organisation. It explains the process for ensuring that users can access the CAMS portal by being part of the correct SSO group and guides in resolving access issues.
Overview
CAMS uses Single Sign-On (SSO) authentication to simplify and secure access to the platform. To ensure users can log in and access CAMS, they must be part of the main company SSO <CAMS app> group. The group name may vary within different organisations, but it is essential that admins assign users to this group for proper access.
If users experience login issues, it's typically because they have not been added to the <CAMS app> group. In such cases, users must reach out to their admins, who can then manage the group membership via the company's SSO platform.
Step-by-Step SSO Access Process
Step 1 -Confirming Permissions for CAMS Access
To ensure users have the necessary permissions for the CAMS platform:
- Admins must add users to the SSO <CAMS app> group. This group is managed by your organisation's IT team within the Identity Provider (IdP) system.
- The <CAMS app> group is a centralised group in your company's SSO system that controls who has access to the CAMS portal. email.
Step 2 - Admin Responsibilities
IT admins are responsible for managing users’ access to the <CAMS app> group. Admins must ensure that users are part of this group if they need access to CAMS.
- If users are added by their admins, they must be part of the main company’s SSO <CAMS app> group. This allows users to access the CAMS platform without additional permissions.
Step 3 - User Access and Permissions
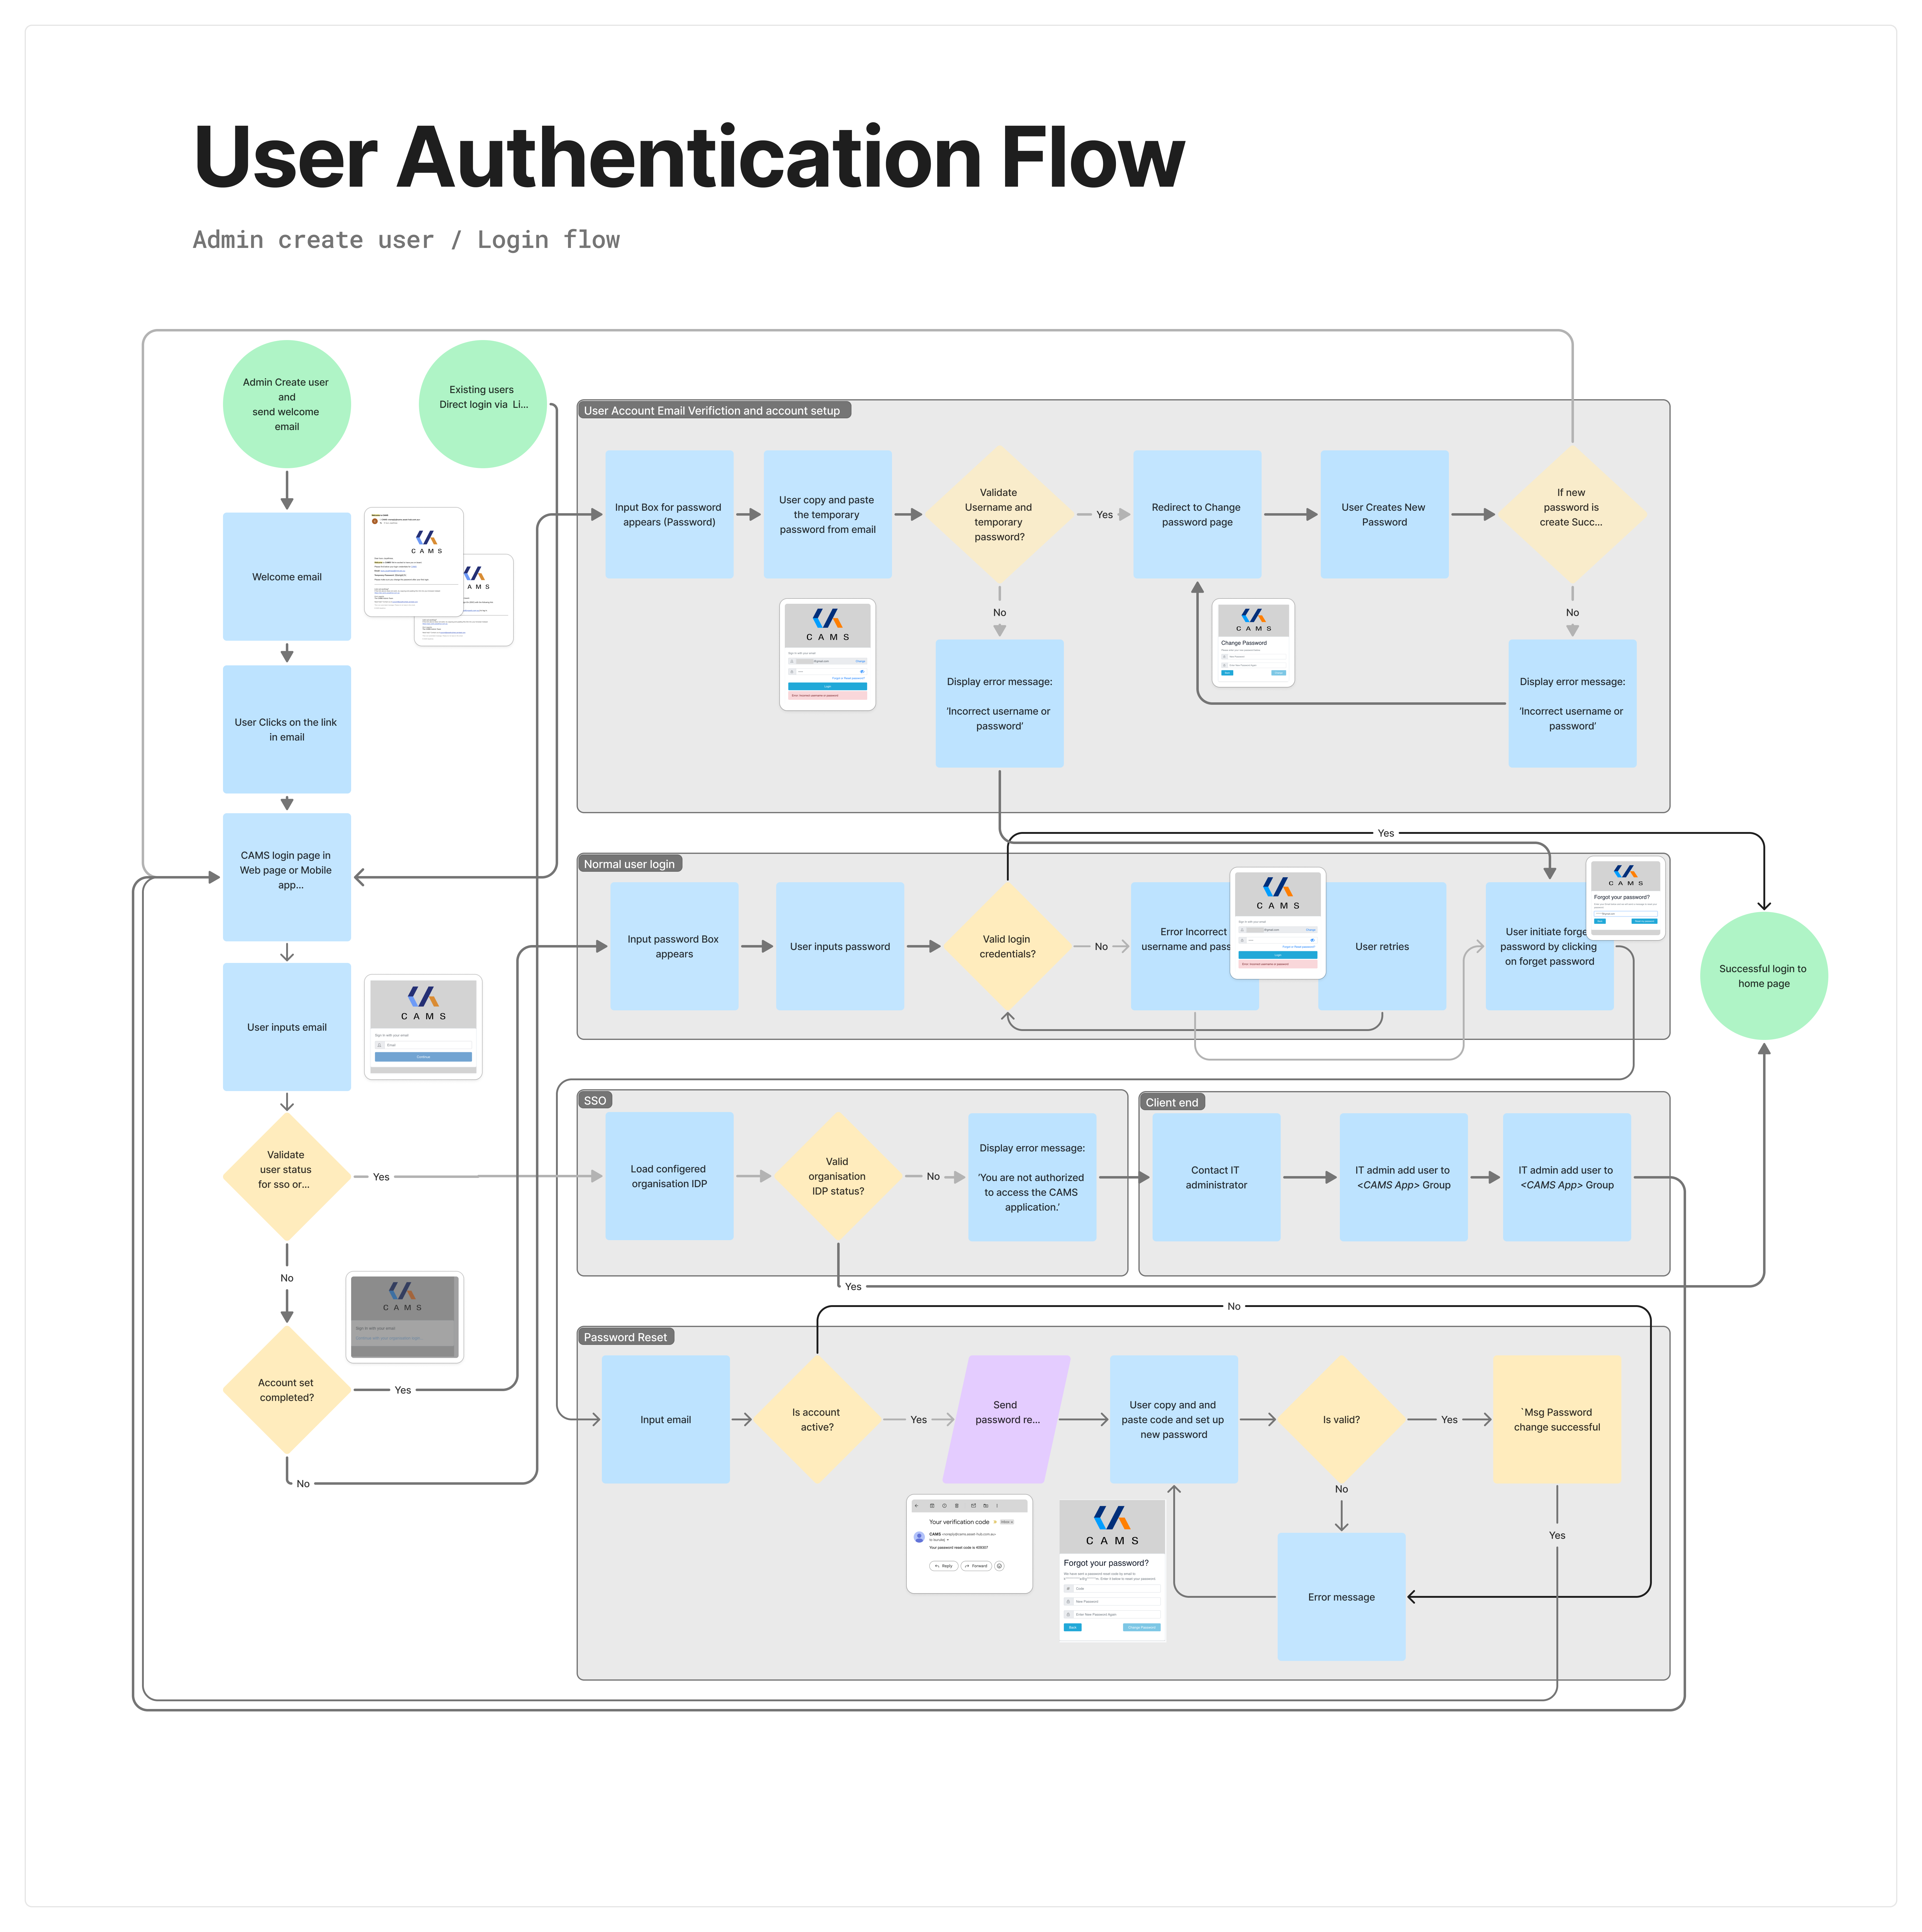
When users log into the CAMS platform, the system will check their membership in the <CAMS app> group within the company’s SSO. If they do not belong to the group, they will not have access to the system.
If the user is part of the <CAMS app> group:
- Access to the CAMS portal is granted automatically via SSO authentication.
If the user is not part of the <CAMS app> group:
- An error notification will appear stating that the user does not have the necessary permissions.
- The user will need to contact their admin to ensure they are added to the appropriate group.
Step 4 - What Happens When Users Lack Access
If users cannot log in because they don’t have access to the system:
- End users need to contact their admin to ensure they are part of the <CAMS app> group in the company’s SSO system.
- Admins can then verify user membership and manage permissions within the SSO platform.
Step 5 - If the user is not part of the SSO portal
- If the user is not part of the SSO portal, an error notification will appear, stating that the user does not have the necessary permissions.
- In this case, contact your organisation's IT team regarding the <CAMS app> (group) to ensure proper access to the CAMS portal.
Note: The <CAMS app>p (group) may be named differently within your organisation, and we are assuming it could be called something like "CAMS app." Please verify the exact name with your IT team.
Adding Users to the CAMS Platform
If you're an admin and need guidance on how to add users to the CAMS platform, please refer to the article below:
Setting Up an SSO User Account in CAMS
- This article provides a detailed step-by-step guide on how to set up an SSO user account for CAMS access.'
Adding the CAMS App to Azure AD
To add the <CAMS app> as an enterprise application in Azure AD, please refer to the following article:
Add <CAMS app> as an enterprise application in Azure AD
- This guide explains how to add the <CAMS app> to your Azure AD system.
Conclusion
For users to access the CAMS platform, they must be part of the correct <CAMS app> group within the company’s SSO system. Admins are responsible for adding users to this group. If users experience issues accessing the system, they should contact their admin to ensure their permissions are properly configured.
If any issues arise or further support is needed, please contact support@assethubhelp.zendesk.com.
The authentication flow is outlined below:
