Uploading Photos in CAMS
Photos can be uploaded to any level configured for your organisation. By default, images are uploaded at the Building level and Inspection level. The steps for uploading photos are the same across both categories.
For Admins or Editors
Step-by-step: Uploading photos
Step 1 – Prepare your images
-
Make sure your photos are saved to your device. Create separate folders for building and inspection photos to avoid confusion.
-
If your images are saved across multiple locations, move them to a single folder.
-
Rename each photo using a simple and clear naming format such as:
-
1.jpg -
asset1.png -
siteplan.pdf
-
Accepted file types: JPG, PNG, and PDF are most commonly supported, but these may vary based on your organisation’s configuration.
Step 2 – Select the photo category
-
Navigate to your organisation in CAMS.
-
Click Attach Photos in the side menu.
-
Use the drop-down to choose the category where you want to upload images:
-
BuildingPhoto
-
InspectionPhoto
-
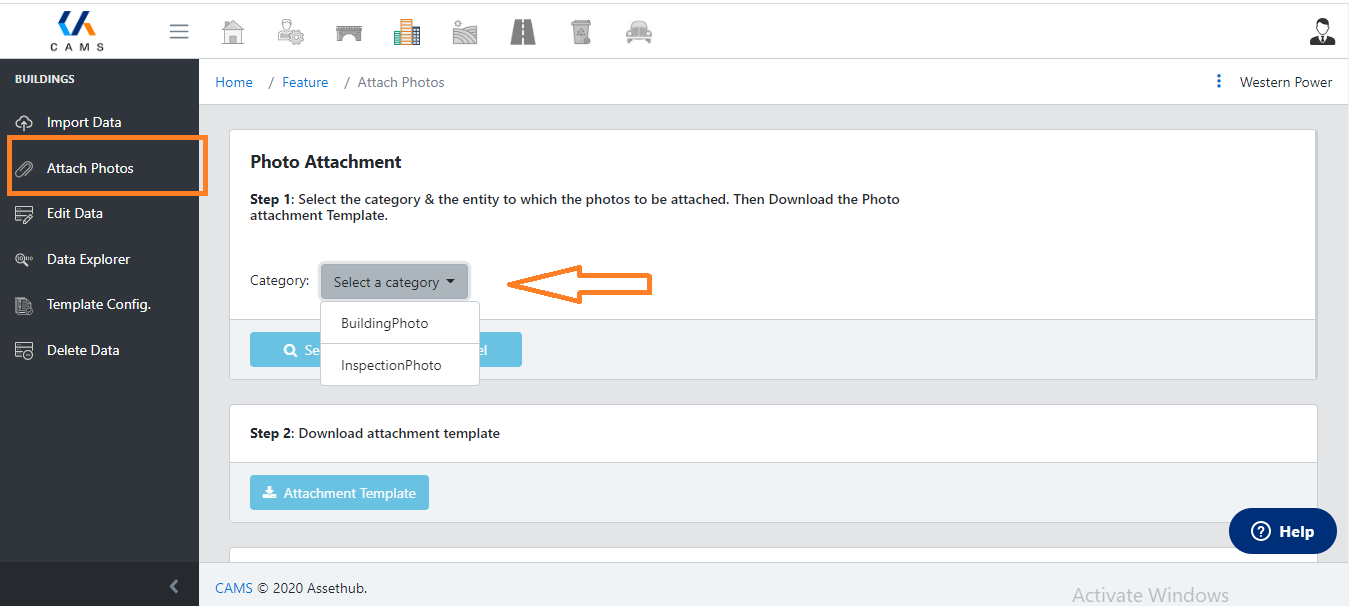
Step 3 – Export the attachment template
-
After selecting the photo category, the data structure will expand.
-
Scroll down and click Attachment Template to download the spreadsheet template.
-
This template links your photos to the correct records.
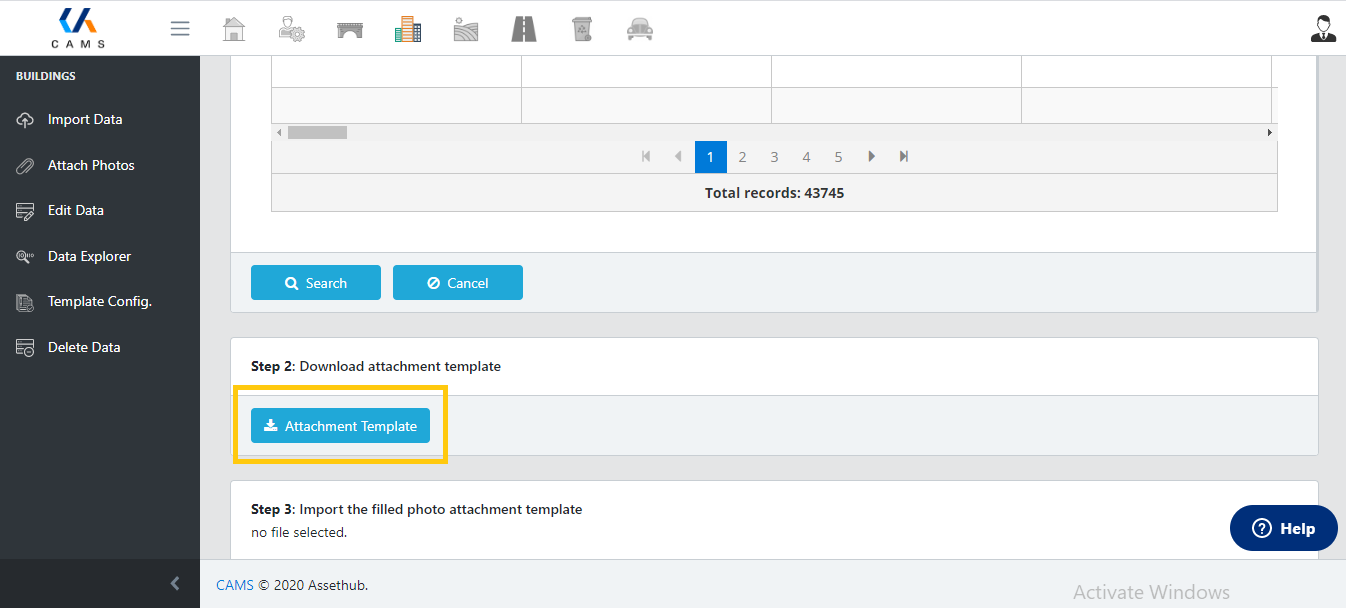
Step 4 – Fill in the template
-
Open the spreadsheet and enter your photo file names in column D next to the relevant rows.
-
Remove any rows with empty fields.
-
You can filter by blank values in Excel to do this in bulk.
-
-
Save the completed spreadsheet.
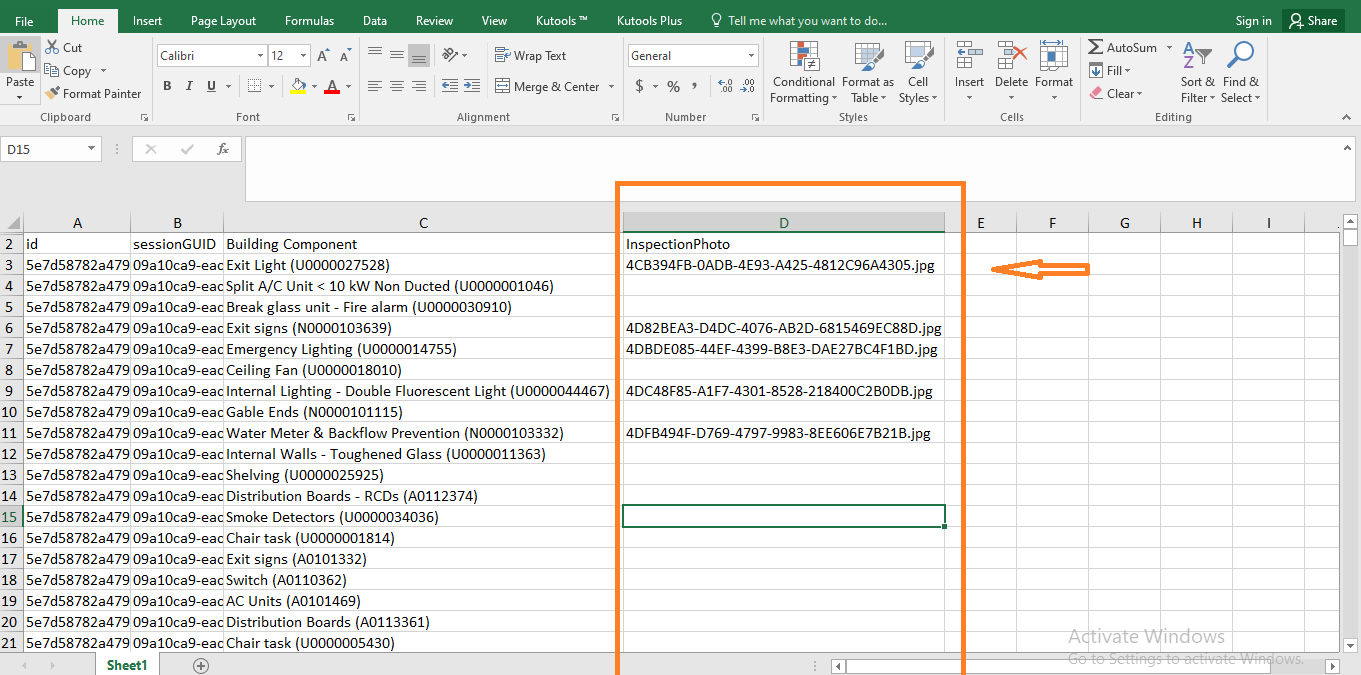
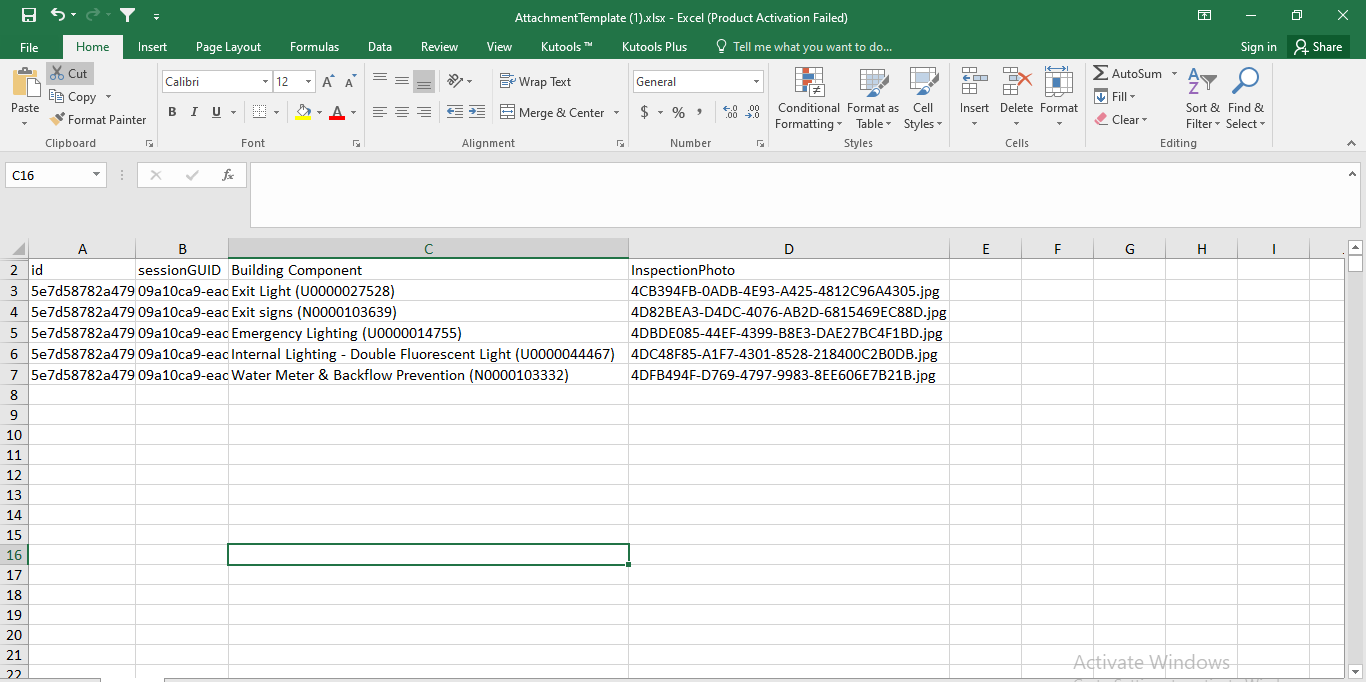
Step 5 – Upload the template
-
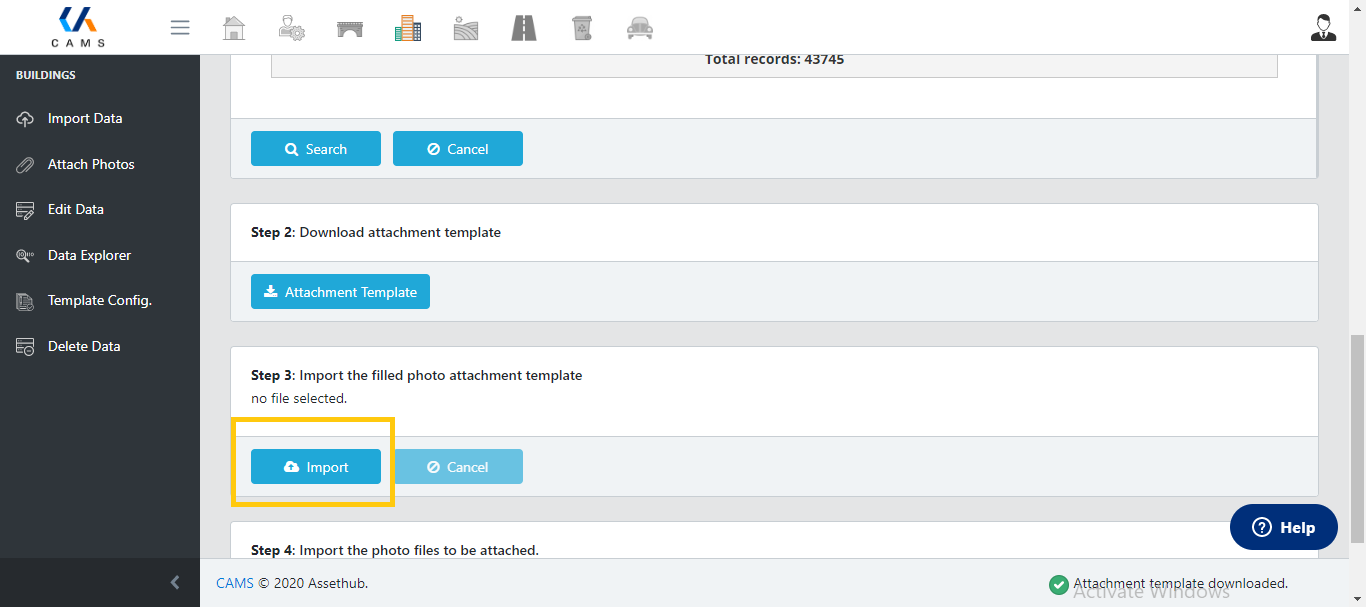
Return to CAMS and click the Import button to upload the completed template file.
Step 6 – Upload your photos
-
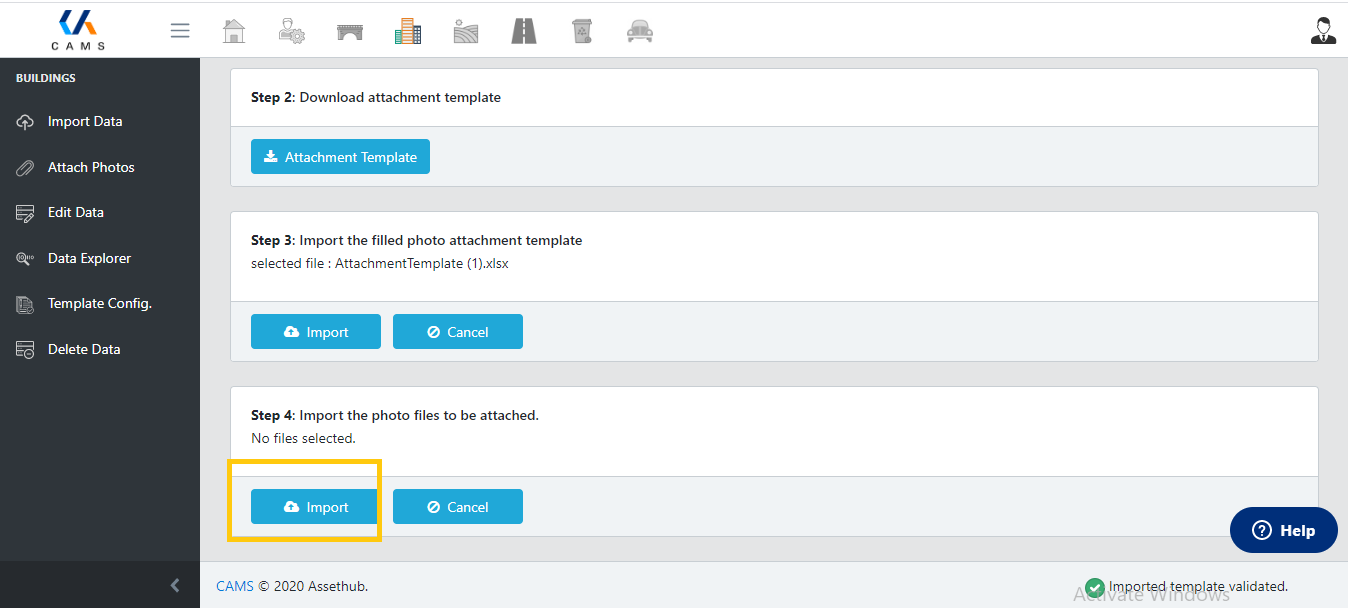
Click Import again to upload the actual photo files.
-
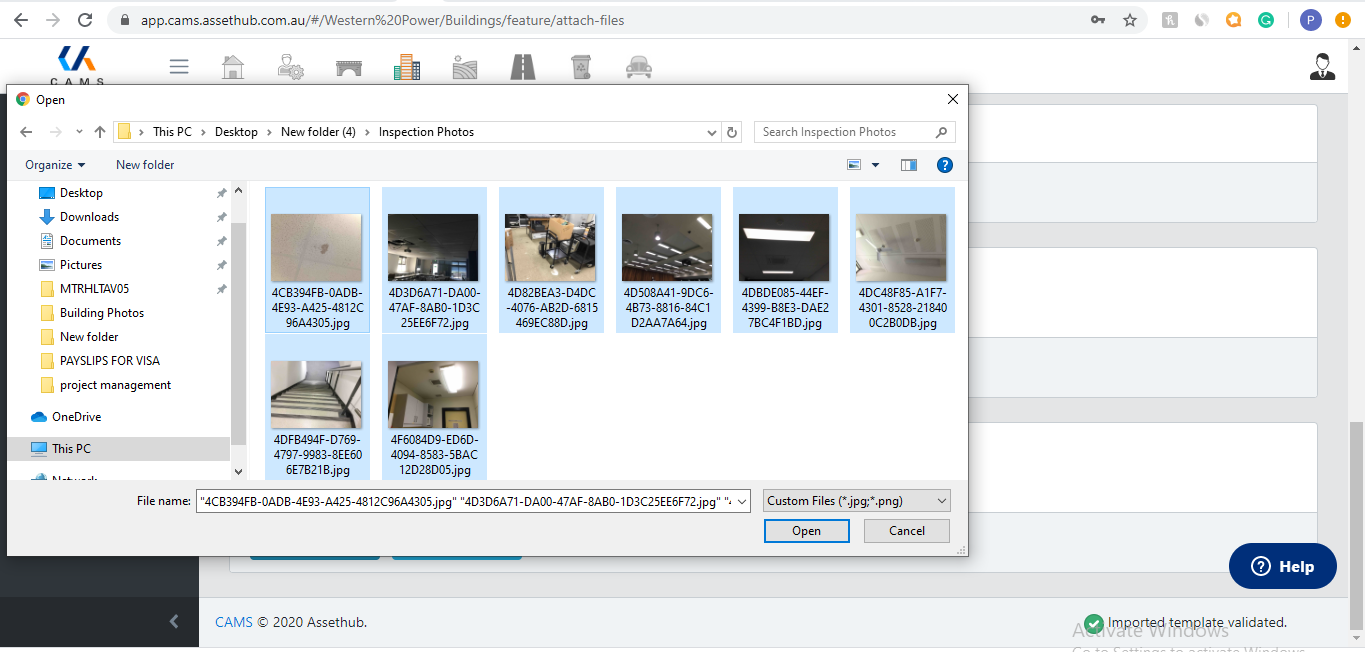
Select the relevant photos from your folder or select all.
-
CAMS will automatically match each file to the corresponding name listed in your template.
-
A progress bar will appear at the bottom of the screen.
Once completed, your photos will be attached to their respective records.
Viewing uploaded photos
-
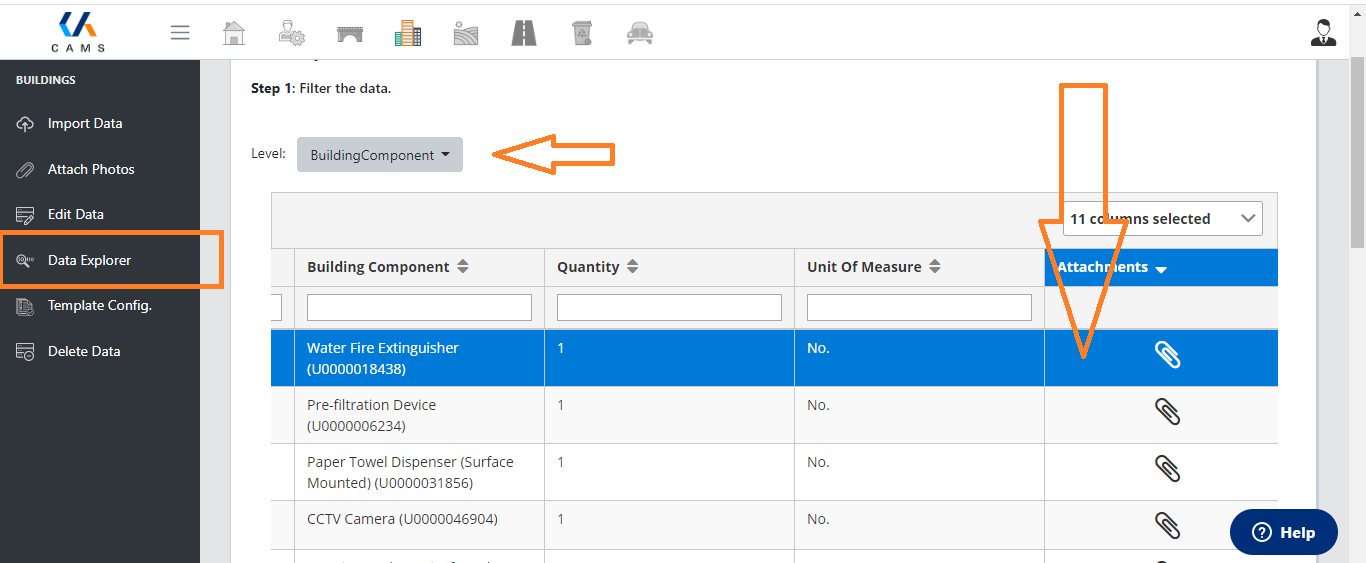
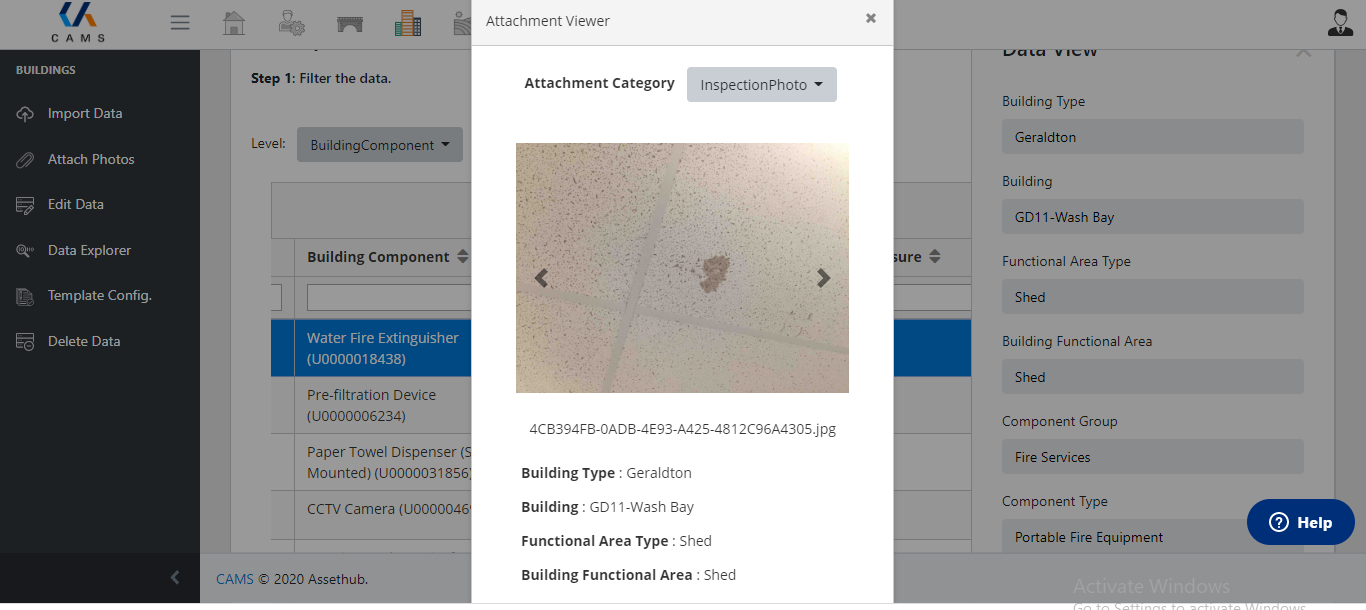
Go to Data Explorer.
-
Select the appropriate level:
-
Building level to view Building Photos
-
Building Component level to view Inspection Photos
-
-
Uploaded images will appear under the Attachments section.
Note: The level at which photos appear is configurable per client. Contact your system administrator if you are unsure where your photos are set to display.
Need Help?
If you need assistance with photo uploads or want to configure new attachment levels, click the Help? button at the bottom of the page. Our support team is available to assist.
For more guides and detailed walkthroughs, visit the CAMS support centre.